Tutorial: Getting Started With UISpec on XCode 3
Update: There’s now an XCode 4 version of this tutorial.
This is a Quick Start Guide that shows how to get you started with Acceptance Test Driven Development for the iPhone, using UISpec.
The following were used in the creation of this tutorial:
- XCode 3.2.5
- iOS SDK 4.2
- UISpec version 1.1 (subversion revision 82)
Suggestions on how to improve this guide are much welcome, in which case you can use the comment form at the end of this page.
Step 1: Create a New XCode Project
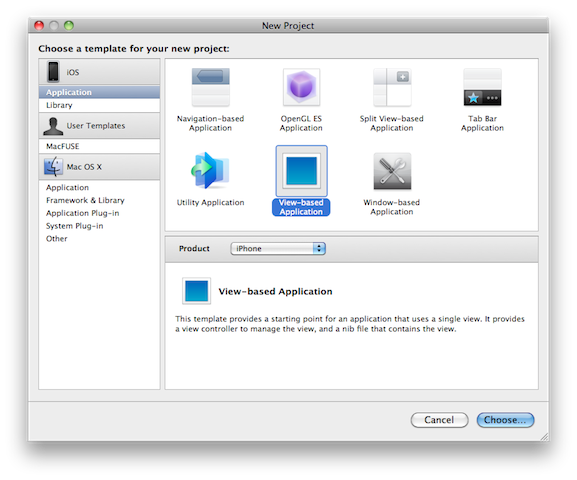
- Start XCode and create a new View-based Application project.
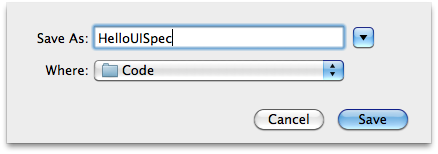
- Name it HelloUISpec
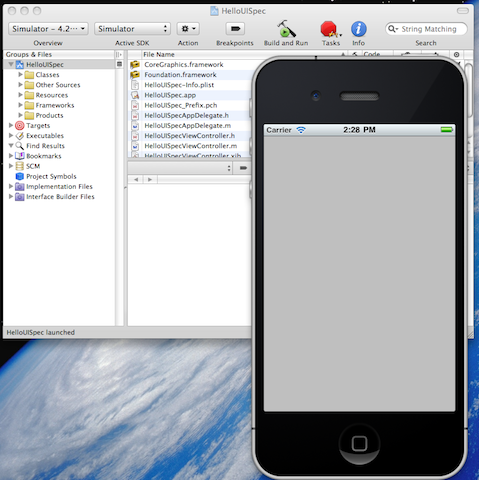
- Build and Run the empty application to make sure the new project was set up correctly.
Step 2: Install UISpec
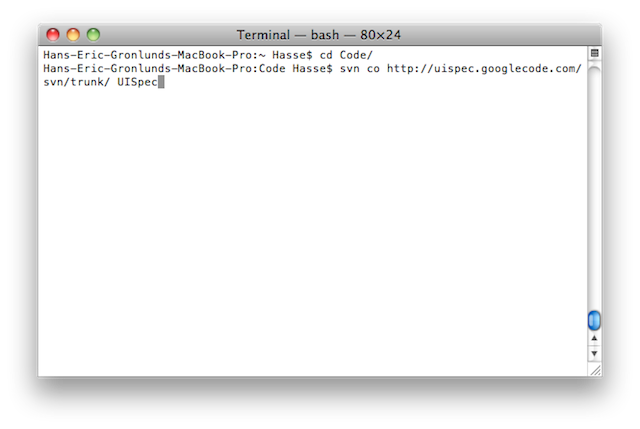
- Open a Terminal Window and navigate (using the cd command) to the directory where you save your XCode projects.
- Checkout the UISpec code from subversion with this command:
svn co http://uispec.googlecode.com/svn/trunk/ UISpec
- Close the Terminal Window and go back to XCode.
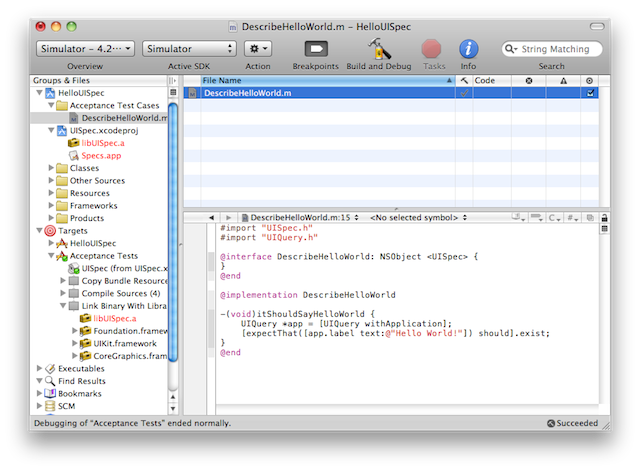
- Create a new target for your acceptance tests by expanding the Targets node of the Groups & Files pane, right click the HelloUISpec target, and choose Duplicate in the context menu.
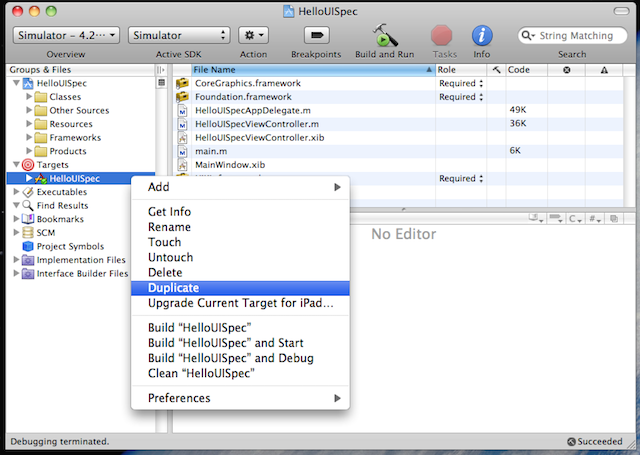
- Change the name of the new target, from “HelloUISpec copy” to “Acceptance Tests”
- Add a reference to the UISpec project by right clicking HelloUISpec (the root node in your project) and choosing Add Existing Files…
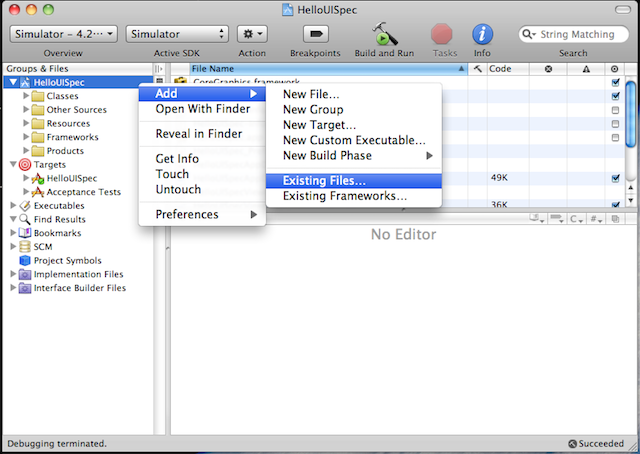
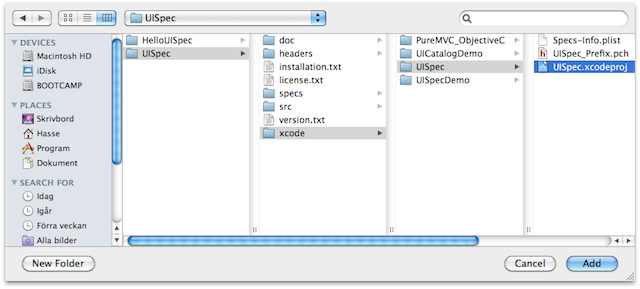
In the dialog shown, navigate to UISpec/XCode/UISpec and select the file UISpec.xcodeproj.
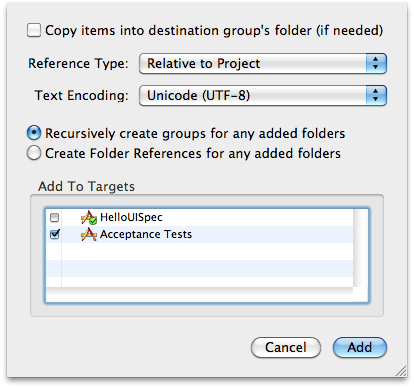
Click add and in the next dialog, make sure the Copy items into destination group’s folder alternative is unchecked, and that Reference Type is set to “Relative to Project”. Finally, make sure that Acceptance Tests is the only target that UISpec is added to.
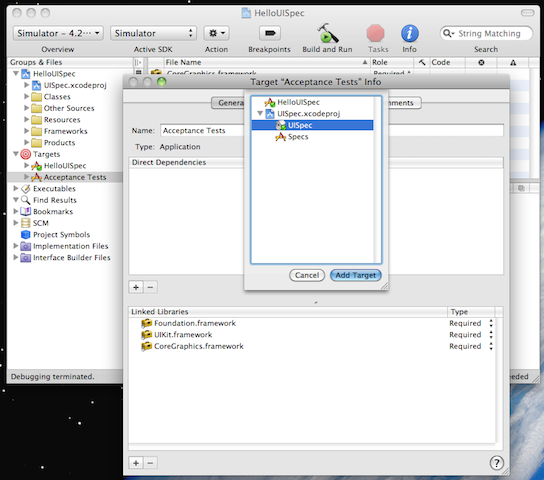
- Add a direct dependency to UISpec by selecting the Acceptance Tests target and clicking the Info button on the tool bar. In the General tab, add a direct dependency to UISpec by clicking on the associated + button.
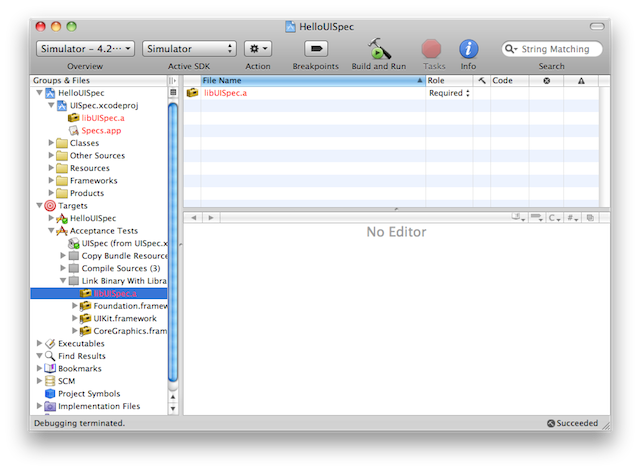
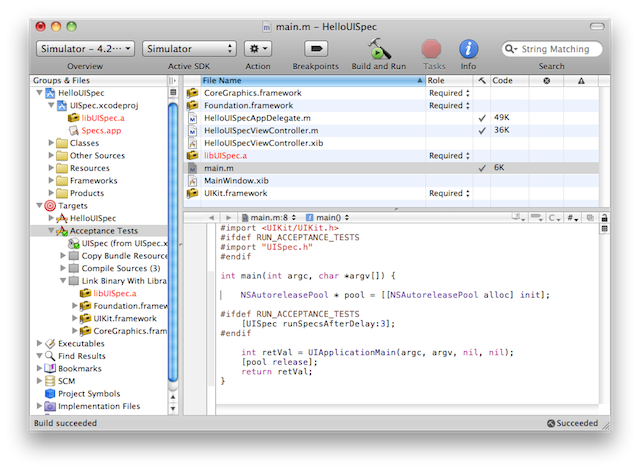
- Add a dependency to UISpecs static library by expanding the UISpec.xcodeproj node in the Groups & Files pane, and dragging the libUISpec.a node to the Link Binary With Library node under the Acceptance Tests target node.
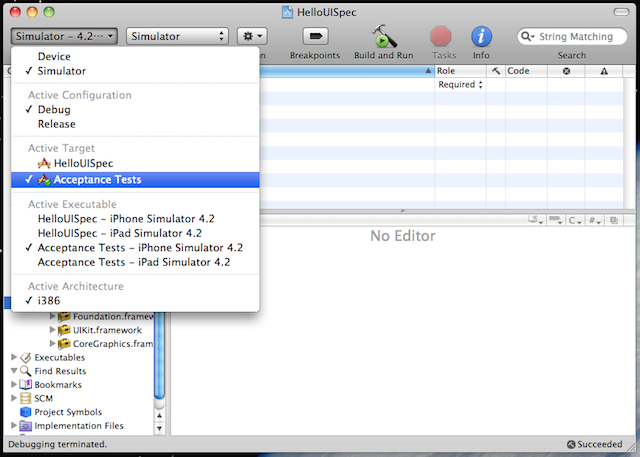
- Change the active target to Acceptance Tests in the Overview drop-down menu on the tool bar.
- Hit the Build and Run button on the tool bar just to see that the still empty app runs before we move on to add the code that triggers the testing framework.
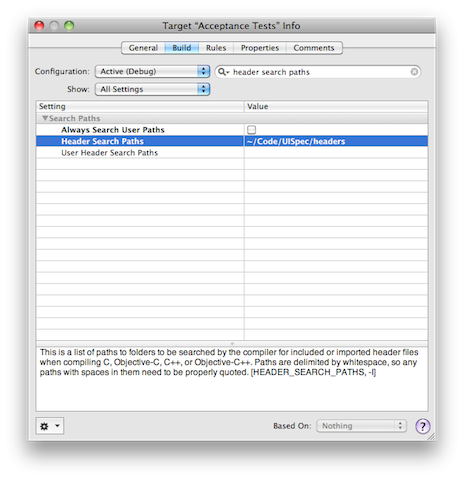
- Add the path to UISpec header files by selecting the Acceptance Tests target node, clicking the Info button on the tool bar. On the Build tab, change the value of Header Search Paths to UISpec’s headers directory; If you save your projects in a directory called Code in your user root directory, the value should be:
~/Code/UISpec/headers
As a tip, an easy way to find Header Search Paths in the list of settings is to use the search control.
- Replace the project’s main.m file with the following code:
#import <UIKit/UIKit.h> #ifdef RUN_ACCEPTANCE_TESTS #import "UISpec.h" #endif int main(int argc, char *argv[]) { NSAutoreleasePool * pool = [[NSAutoreleasePool alloc] init]; #ifdef RUN_ACCEPTANCE_TESTS [UISpec runSpecsAfterDelay:3]; #endif int retVal = UIApplicationMain(argc, argv, nil, nil); [pool release]; return retVal; } - Add the RUN_ACCEPTANCE_TESTS define by once again selecting the Acceptance Tests target and bring up its Info dialog. On the build tab, change the value of the Preprocessor Macros setting (which you’ll find in the GCC 4.2 – Preprocessing section) to RUN_ACCEPTANCE_TESTS.
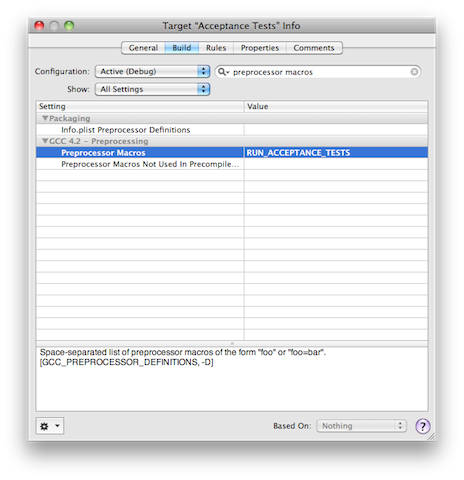
- Build and Run.
Now, your project is ready for the next step, which, if you’re a good TDD practitioner, is to write a failing acceptance test.
Step 3: Write a Failing Test
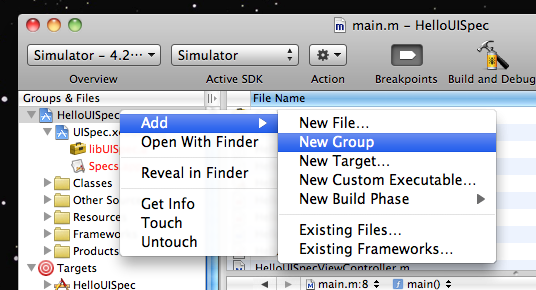
- Add a new group to your project by right clicking the project root node (HelloUISpec) and selecting Add/New Group.
Name the new group “Acceptance Test Cases”.
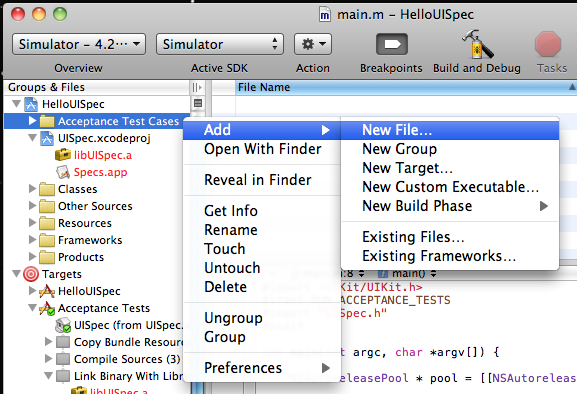
- Add a new test case file by right clicking the new “Acceptance Test Cases” group and selecting Add/New File…
Select the template Objective-C class and click Next.
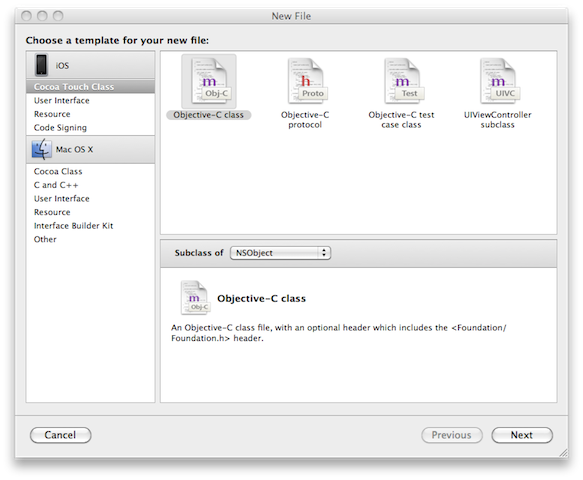
Enter DescribeHelloWorld.m as the name and make sure that the Also create header file option is unchecked. Make sure Acceptance Tests is the only designated target.
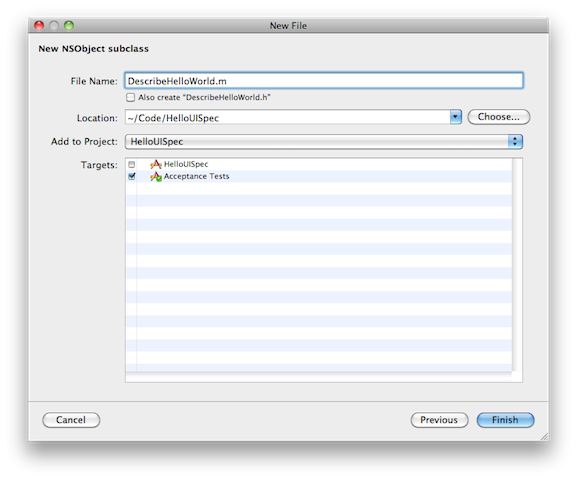
- Byt ut innehållet i DescribeHelloWorld.m med följande kod:
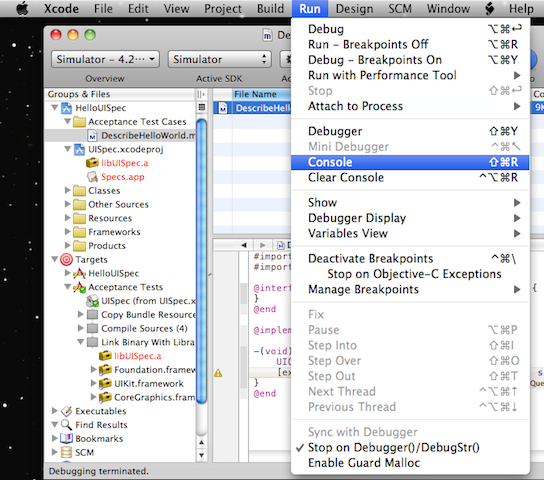
#import "UISpec.h" #import "UIQuery.h" @interface DescribeHelloWorld: NSObject <UISpec> { } @end @implementation DescribeHelloWorld -(void)itShouldSayHelloWorld { UIQuery *app = [UIQuery withApplication]; [expectThat([app.label text:@"Hello World!"]) should].exist; } @end - UISpec communicates through the Debug Console, so in order to watch the test fail select Run/Console on the XCode menu.
- Hit the Build and Run button and keep an eye on the Debug Console. The message is ugly, but tells us indirectly that no label was found within the application.
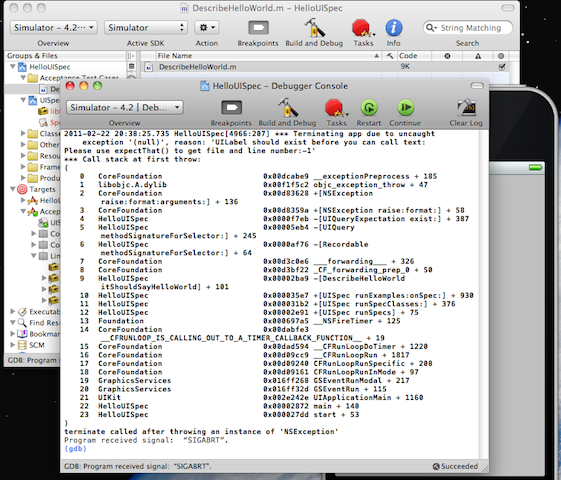
Now it’s time to make the test pass.
Step 4: Make the Test Pass
- Start Interface Builder by double clicking the file HelloUISpecViewController.xib (which you can access if you select the Acceptance Tests target).
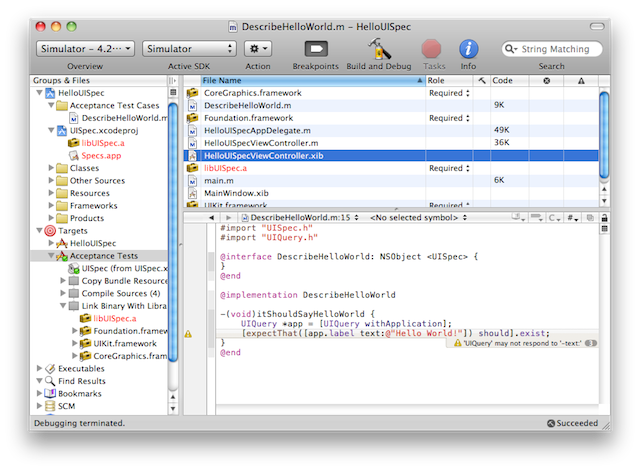
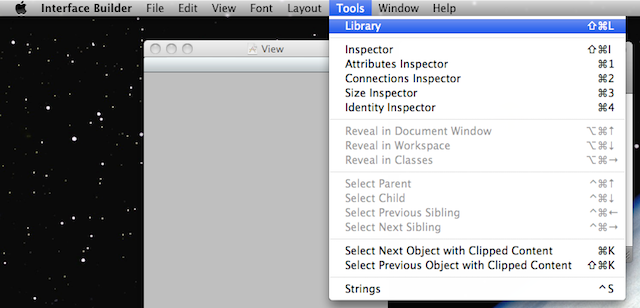
- In Interface Builder, bring up the Library window by clicking Library under the Tools menu item.
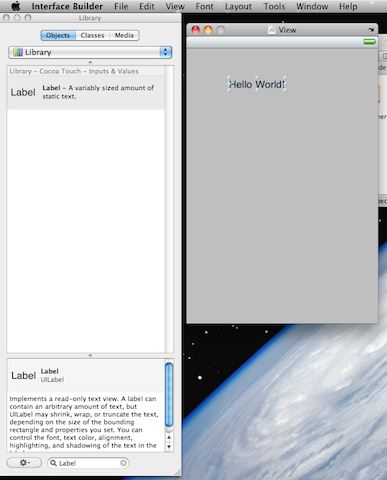
- Find the Label control in the Library window (tip: use the search field at the bottom of the window) and add a new label by dragging and dropping on the View window. Change the text of the label to “Hello World!”.
- Save the new user interface with cmd-S.
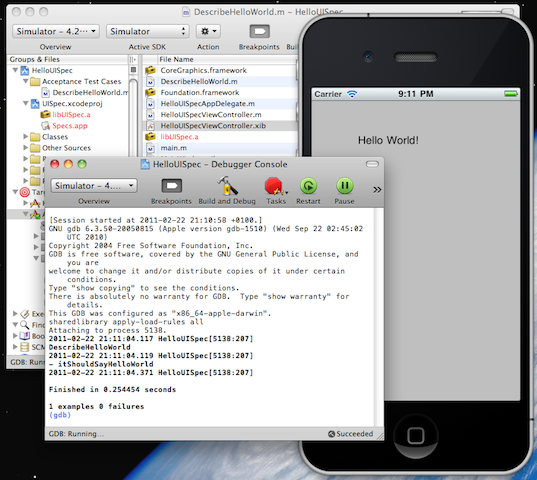
- Go back to XCode, hit the Build and Run button and keep an eye on the Debug Console. It should now show a message that informs us that there were no failures.
Thanks so much for this tutorial. It was such a struggle to decide what testing framework I should use.
Do you have any thoughts on GHUnit (https://github.com/gabriel/gh-unit) for unit tests?
Or would you say that UISpec is a one-size-fits-all approach to testing?
@Nathan Broadbent
Thank you Nathan.
I like GHUnit and am myself using it for my unit-testing. I haven’t tried Google’s toolkit but I’ve seen it recommended by many and it may be a good alternative. I got ticked off by the built in framework because it runs the tests as a part of a build. For some reason I don’t like that idea.
I wouldn’t use UISpec for anything but acceptance testing. I might change my opinion in the future but for now it feels a bit too crude to be an effective unit-testing framework.
Great, thanks for your reply! Do you recommend a specific way to work with GHUnit and UISpec at the same time? For instance, do you set up 3 targets (main code, acceptance tests, unit tests), or do you put all of your tests into one target?
Thanks for your help!
I use separate targets for my acceptance tests and my unit tests (using GHUnit). This is a must, because acceptance tests and unit tests are very different in nature.
Acceptance tests usually takes a lot more time to execute so they would be an impediment to my Failing unit-test -> Working unit-test -> Refactor loop.
Also, acceptance tests may stay unsatisfied for a longer period of time, while unit-tests should be brought to a working state as soon as possible and then be kept “green” at all time.
@Hans-Eric
Thanks so much for your help, I think thats all of my iOS TDD questions answered! Really appreciate it
Great write up. Very helpful. Unfortunately for me, I didn’t know about it until I eventually figured it out myself.
Now that I’m trying to use UISpec, I’m running into usage problems you may have experience with. In particular I’m trying to access a toolbar button with a particular title. Nothing that I try with UISpec has worked. ‘show’ doesn’t show any property on a button with its title. Its a programmatically created button, but from IB.
Any suggestions?
A little cheat sheet with examples of how to search for common controls would be extremely helpful.
Thanks
@David Melgar
Thank you David!
For your particular problem I’m afraid I can’t be of much help. Programmatically created buttons isn’t something I have any experience of.
Good idea with the cheat sheet. I may pick up on that.
Regards
i am not getting the results eventhough i go through this procedure ,the gdb i s running and the steps were also right ,bu t the run console does not show the output,
It says session started ,but not the actual output
Hi Hans,
Great walk through. Helped me understand UISpecs better.
Are there any tools that help in unit testing without having anything to do with Xcode. I just want some mechanism through which I can test an application with just the .ipa given to me
how can i test external .app / .ipa file using uispec in xcode??
Hi
Is it possible to use UISpec to automate mobile web instead of apps only ?
Regards
Ragavan